All,
Step 1. Configure your Custom Properties
You will need to configure two different Custom Properties (CP)to let SolarWinds be able to decipher between the different types of devices and the operating system running on them. Navigate to the following location: Settings > All Settings > Manage Custom Properties.
The first CP you will need to configure will be: C1_DeviceType. Configure this one with a drop-down menu system to provide defined variables.
Add these values: Layer 2, Layer 3, Router, Firewall, VPN
If you need help identifying the different between the different types of devices you can download the following Compliance Report: CourtesyIT – Networking Protocols. There are two ways to get this report.
- You can navigate through the Orion Web Page to the following location: My Dashboards > Network Configuration > Compliance > Manage Policy Reports Tab > Shared on Thwack
- You can also find it here: https://thwack.solarwinds.com/content-exchange/network-configuration-manager/m/policy-documents/2634
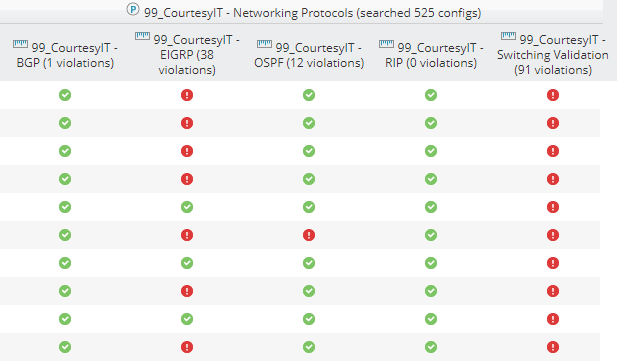
If there is a red dot in the column next to your device that means that Solarwinds has found evidence of a routing protocol and/or switching configurations. If there is a red dot under a routing protocol and not under switching this means you have a Layer 3 Device. If there is only a red dot under switching, then you have a Layer 2 device. If SolarWinds has found only a routing protocol, then you have a router.
The second CP you will need to configure will be: C2_OS. Configure this CP with a drop-down menu system to provide defined variables.
Add these values: IOS, IOS-XE, NXOS, IOS-XR, ASA, SRX
*You may need to add other types of CP values with different vendor types of operating systems.
To make this job an automated task you can run download two alerts I have created to get you started.
https://thwack.solarwinds.com/content-exchange/the-orion-platform/m/alerts/3480
https://thwack.solarwinds.com/content-exchange/the-orion-platform/m/alerts/3479
You can add to these alerts with devices you have in your environment. You can also Duplicate and Edit these for Cisco NXOS, Juniper, Arista, Fortinet, and so on.
Step 2. Configure Config Types
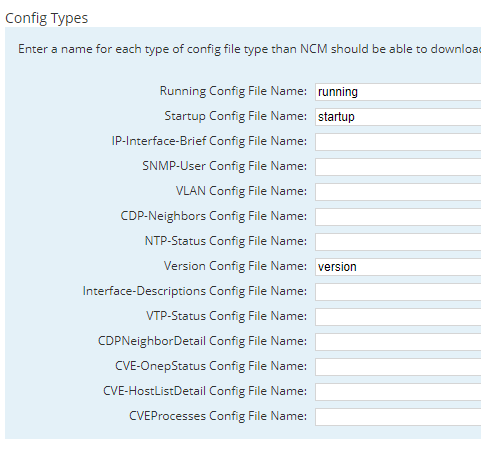
Config Types is where you tell Orion what type of configuration to download. In order to configure the device types navigate to the following location: Settings > All Settings > NCM Settings in the Product Specific Section. Under the Config Settings section go to Config Settings first to adjust a setting. Move the Config Min Length from 11 to 1. You will need this for some Config Types.
Now lets go over to Config Types. These are all show commands in a Cisco Device. You will need to provide a label for these type of commands. Type in the box at the bottom of the screen the label for the config type.
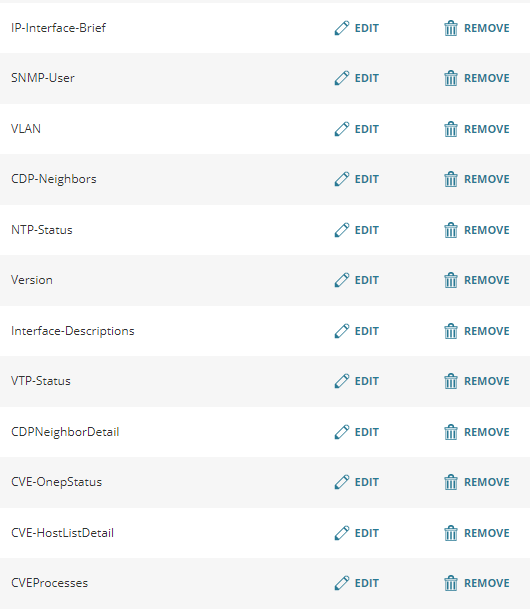
Now what we need to do is configure the actual show command for Orion to download the information from your devices by using Device Templates.
Step 3. Download the Device Template
- Navigate t the following location: Settings > All Settings > Device Templates. From here you can modify the Cisco IOS template by completing the configurations.

- Keep in mind the show command is inherent, so you do not need to add it.
You can also import a completed Device Template from Thwack. There are two ways to get the proper device template that we will use for NCM Compliance.
Device Template: 01_CourtesyIT – Cisco IOS
- You can navigate through the Orion Web Page to the following location: Settings > All Settings > Device Templates > Shared on Thwack Tab.
- You can also find it here: https://thwack.solarwinds.com/content-exchange/network-configuration-manager/m/device-templates/3478
Step 4. Configure NCM Jobs
This section you will have Orion download your various config types automatically, so your Compliance Report information is accurate. Navigate Orion to My Dashboards > Network Configuration > Jobs
I always grab the information three or four times a week and then purge anything older than 6 months.
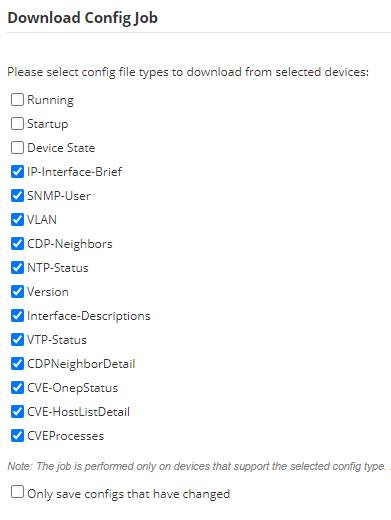
Be sure to run the job at least once.
Step 5. Compliance Reports
This step will be to configure Orion to run your compliance reports. There are two ways to get the compliance reports.
- You can navigate your Orion Web Page to the following location: My Dashboards > Network Configuration > Compliance > Manage Policy Reports > Shared on Thwack Tab.
- You can also locate them on Thwack here: https://thwack.solarwinds.com/content-exchange/network-configuration-manager/m/policy-documents
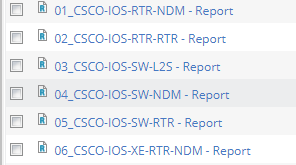
The reports come into different formats. If the Policy Document has the word “Report” at the end of it (example in picture below) then you will have the entire policy wrapped into a single page. This might be difficult to post on a slide or work from if you are not familiar with this feature of the product.
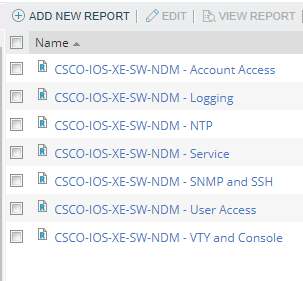
You can always break out the rules and name them as you please but will take you sometime to organize. If you see these type of policy documents (example in picture below) then I have already broken them out into smaller chunks which might be easier to work with.
Please download as you see fit the Policy Document you chose to work with.
Step 6. Updates
DISA will update these from time to time. Every quarter there are some updates. Most updates are fixing typo errors, wording in discussion or content areas, and deletion of expired findings. Simply download the new updated STIGs from DISA Website: https://public.cyber.mil/stigs/downloads/ and review the Revision History PDF. Make the appropriate changes to the Compliance report you already have. You do not need to download the new reports from Thwack.
1. Cisco Systems.
2. Juniper Networks
3. F5 Networks
4. Palo Alto Networks
5. Fortinet
6. Arista
7. SRG's
8. HP FlexFabric
9. A10 Networks
10. WLAN
11. CVE's
12. CourtesyIT Favorites