- When it comes to upgrading the SolarWinds environment, it may seem like a pretty straightforward process but actually, it is NOT.
- I had encountered various issues which were lead to time-consuming troubleshooting.
- But we can avoid most of the upgrade issues by simply following the below steps correctly.
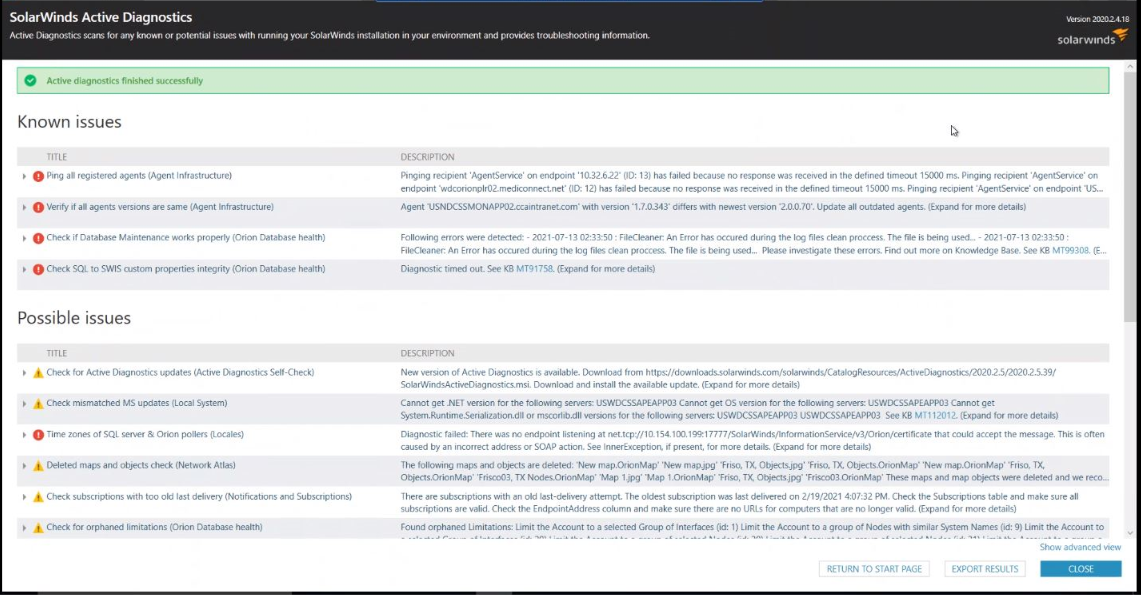
01.) As a best practice, it is better to perform the SolarWinds Active Diagnostics test. By so doing, it will show you the status of the Orion environment, Pending issues, etc.
02.) Should complete the Windows Updates and perform a server reboot on all the SolarWinds platform servers including the Main Polling Engine server, Additional Polling Engine server, Additional Web server.
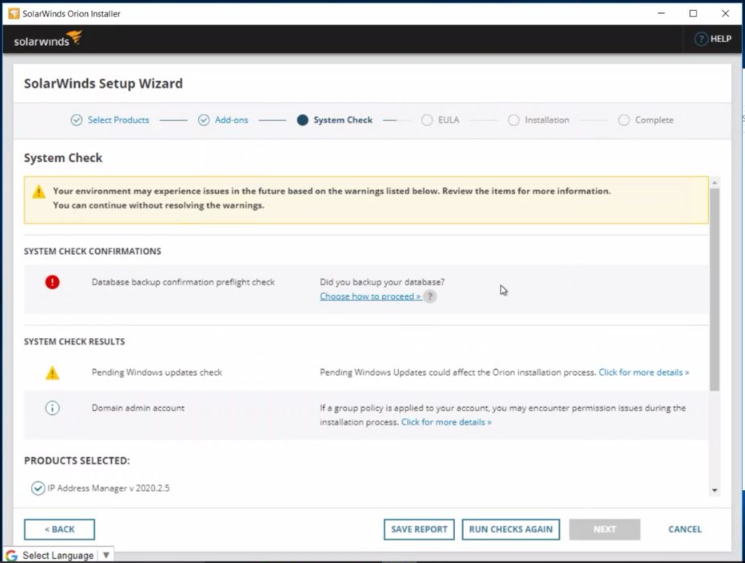
03.) If the SolarWinds platform is running on a Virtual environment, it is advisable to install the latest Windows Updates on the VMs and backup the VMs with the current working state of the SolarWinds platform.
04.) Complete the backup of the SolarWinds Database and backup the Database server if the server is running on a Virtual environment.
05.) Gather all the required credentials. (Eg: Database credentials, Windows credentials, Local Administrator account credentials, SolarWinds Customer Portal Credentials Etc.)
06.) Perform a reboot on all the servers, 02 hours before the actual upgrade.
07.) Select a convenient time frame for the upgrade process where the extended maintenance windows can be accommodated.
08.) It is recommended to use a Local Administrator account to perform the upgrade.
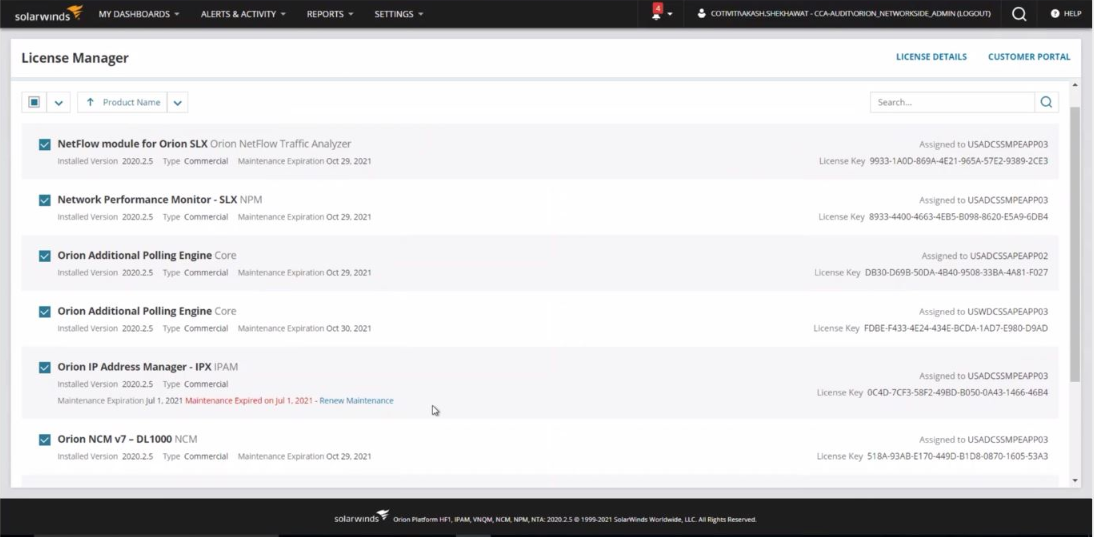
09.) Carefully check the License Status of each module and take note of them for later reference.
10.) As per my experience using the Offline Installer file for the upgrade process would be advisable.
- By following the above steps, we would be able to avoid any excess time-consuming tasks and perform a smooth upgrade without any issues.
